
I’m really happy with the voice actors that we chose for Hex and Neph. I think they do a great job of bringing tons of personality to the lines and what would have otherwise been plain text hints for the puzzles. I decided to go one step further, however, and added a “talking” animation. This accomplishes two important things:
- For players who have their volume turned all the way down (which is often the case for people playing games on their phone), it gives a visual indicator there is audio that they might be missing.
- It adds that ever important extra bit of juiciness to an otherwise simple UI.
The video below demonstrates this talking animation.
For anyone interested, here is a technical breakdown of how I accomplished this effect using Unity and C#. To start, this was done in Unity 2020.1.6f1 with the Universal Render Pipeline, but the required features should be available in almost all Unity versions going back quite a way.
Objects Used
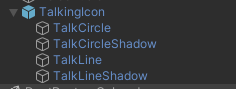
This effect was created using a sprite for the outer circle and a Line Renderer for the “talking” line. Make sure to use a white colored sprite for your outer circle ring so that you can dynamically set the ring’s color.

Animating the Line
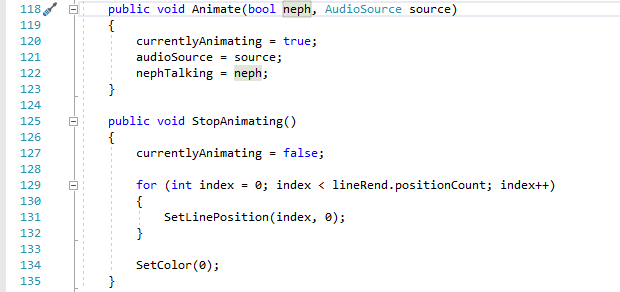
I used a C# script to dynamically change the Line Renderer’s position values and set the color of the line based on who is talking. The class has publicly available Animate and StopAnimating functions which are called when the audio source first starts playing and then when it stops playing.
I’ve got a separate voice manager class that makes these calls using a Coroutine. It uses the audio clip length to determine when the talking animation should stop.

The SetLinePosition and SetColor functions are pretty straightforward.

Syncing the Animation to the Audio
My first iterations of this effect had the points on the line being randomly set at specific intervals. Let’s just say it did not look good and was in fact quite distracting. For it to look natural, the points should expand and contract matching the volume of the audio. This was accomplished by sampling data from the audio clip in the Update function.
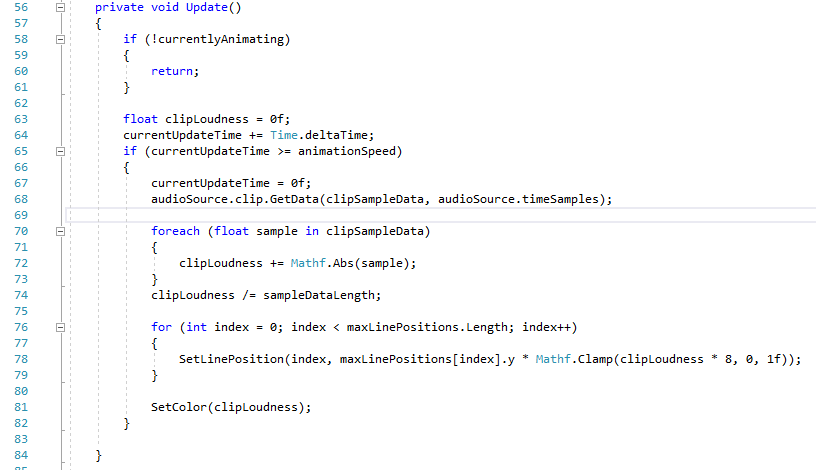
This Update function is where most of the magic happens, so I’ll go over it in more detail. First, we check if we should be animating anything. This value is set inside the public Animate and StopAnimating functions. Next, we only update the line position values every .1 seconds. We use a set interval instead of updating every frame for two reasons: we need to know how many audio samples to take and we want to keep the processing load down.
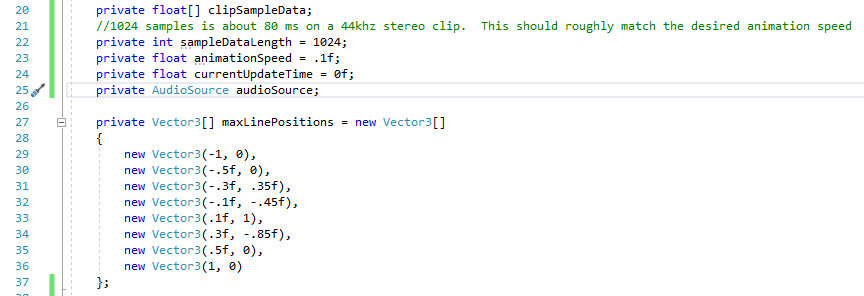
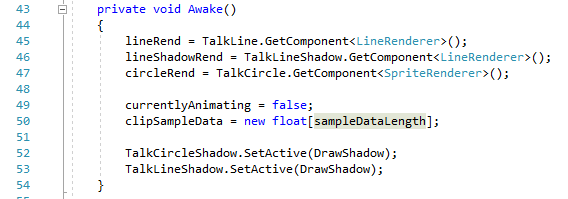
After that, load the data from the audio clip. The clipSampleData array is declared globally and instantiated on Awake so that we’re not constantly instantiating and garbage collecting a big array. The array’s size will change based off how often you are sampling and the type of audio file you are using. If you aren’t sure what value to use, you can always just try out several different values of sampleDataLength and see what it does to your results.
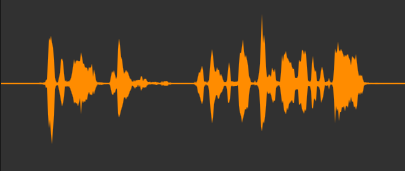
The values retrieved from GetData will range from -1 to 1. You can see that visually if you look at an audio file in Unity. We want to count the negative values just as much as the positive ones, so we take the absolute value and add them all together. We then have to divide across the number of samples taken to determine the overall “loudness” of that .1 seconds.
I used a predetermined set of point values that I liked and then scaled them based off the loudness value. Most sections of the audio will not be anywhere close to a loudness of 1, so I scaled my loudness by a value of 8 but also made sure to clamp the value for any loud sections. The scaling value of 8 was determined entirely through trial and error. Find a value that fits your audio!
There is some very interesting behavior associated with the GetData function, so if you are experiencing any odd behavior, I recommend you check out the Unity documentation.
Smoothing Out the Line Renderer Line
By default, the lines generated by Line Renderer are pretty jagged and looked quite bad. To fix this, I enabled Post-Processing and Anti-Aliasing on my camera for this scene. Also, to get the nice round corners and line ends, make sure to set the “Corner Vertices” and “End Cap Vertices” to some value greater than zero. I used a value of 20 for both those settings.

Adding the Shadow
The shadows were achieved by simply adding a second copy of both the ring and line renderer. They were given an X,Y offset and had their color set to black with an alpha value of 0.5. You can see in the code examples that any time I set the position values for one line, I set them for both. To make sure the “shadows” were underneath, I set the “Order in Layer” values of the non-shadow objects to a higher number. On this screen, I have an object that passes underneath the talking symbol, so all four of these objects were set to a Sorting Layer above the background object.
Create a Prefab
I wanted to be able to create multiple instances of this talking symbol, so I turned the whole thing into a prefab. To make this work, however, you need to make sure and disable the “Use World Space” setting on both of the Line Renderers. This lets you move the prefab wherever you would like on the screen but also lets you set the values of both Line Renderers’ points to be the same keeping the code simpler. One last note is that if you change the scale of the parent container, don’t forget to adjust the width of the Line Renderers!

Giving Back to the Community
I’ve learned so much about using Unity from the multitude of free tutorials out there that I wanted to add my own contributions as a way of saying thank you. It’s because of all those videos and articles that I have been able to get this far along in my game. I plan to add a few more of these technical articles for some of the other effects in my game, so if you found this useful stay tuned for more!